

MayaData announced the availability of Kubera this week. Kubera brings the OpenEBS Enterprise Edition, Litmus, and what we sometimes call Director, and available 24/7 support for the same, under one product to help you run your workloads on Kubernetes. And it is SaaS and easy to adopt as you may have heard.
.png?width=670&name=Cloud%20native%20data%20plane%20on%20Kubernetes%20(1).png)
How did we get here?
This is the beginning of a technical blog series. Please bear with me for a paragraph or so - first, I'd like to share my "Infrastructure evolution lessons learned in the last 20 years". I will explain why the cloud-native data plane on Kubernetes is historically such an exciting and important milestone.
To be clear, I’m Intel_8086 & 💾 years old, but I have missed the punch cards. Twenty five years ago, Storage Administrator was not a job description. Most of my early career was spent locked up in dark and cold datacenters, hacking my way out either punching cables or dealing with networking issues via the Cisco IOS shell. Performance improvement meant replacing failed drives with a back-then my favorite two-platter SCSI Quantum Fireball 1.2GB drives..jpg?width=600&name=This_Machine_is_a_server_DO_NOT_POWER_IT_DOWN!!_-_London_Science_Museum,_2015-03-19_(by_Binary_Koala).jpg) First WWW server located at CERN with its original sticker that says: "This machine is a server. DO NOT POWER IT DOWN!!"
First WWW server located at CERN with its original sticker that says: "This machine is a server. DO NOT POWER IT DOWN!!"
Photo Credit: Binary Koala
Most software developers didn’t know what a server looked like (like the above image of a web server at CERN). A few of us knew SCSI cabling and putting the right pins in place on ATA/SCSI drives. The summary is Servers & Networking & Storage hardware were the king and queens of the infrastructure. If you knew how to configure proprietary HW like Cisco, Quantum, IBM (maybe NetApp - it was a new cool startup) - you were a part of the elite-IT and high-paid group.
Then we met consumer-grade hypervisors. Virtualization is older than me and existed since the mainframe days from the late 1960s. With the increasing commercial success of ESXi, KVM, XEN and Hyper-V, we all started dealing with hypervisors; and hardware vendors had deep integration with hypervisor APIs. VMware Certified Professionals (VCP) replaced the proud hardware folks on job boards. First, we virtualized the compute, then networking (vSwitches, NSX, firewalls), and finally, storage (vSAN) completed the trio (Compute & Network & Storage - again). Hypervisor was the king of the infrastructure. HCI startups offering a combined software-defined (SDx) solutions got the attention of legacy hardware vendors. HW slowly became a commodity. You would take an off-the-shelf server box, add off-the-shelf parts + hypervisor and 💥 you got a new 🔥 solution everyone is looking for. Hardware vendors resisted, but hypervisors won 🥇.Then our development cycles got faster; we met Agile, cloud, OpenStack, two-pizza teams, webscale & mobile applications, and DevOps. Developers and support teams didn’t want to deal with hardware or installing and maintaining hypervisors either. Simplicity and speed to getting into production have made hypervisors a commodity. We all started consuming cloud VM instances. We wrote our software to talk to cloud vendor APIs. Practically hypervisors became a commodity, making the cloud the king of the infrastructure. Cloud certified IT folks & SREs replaced the hypervisor certified professionals on the chart. Major cloud vendors AWS, GCP, Azure and DO became a provider of the famous trio and more (Compute & Network & Storage & other 5654 SDx solutions - again). Hypervisor vendors resisted, but cloud won 🥇.
Kubernetes, crossing the chasm (aka Graduating), is the new "👸/🤴", and you can’t resist it for long - You got my point. History repeats itself; first, we got cloud native application, then cloud native networking and cloud native dataplane is the last piece of the puzzle completing the famous trio to run both stateless and stateful applications natively without the weight and dependencies of old-generation stack.
Finally, we can fully take advantage of loosely coupled cloud-native APIs and accelerate the application rollout cycle with CI/CD - the way they are meant to be. We can learn from previous patterns and let cloud vendors become a commodity by consuming Kubernetes APIs and abstract all our dependencies.
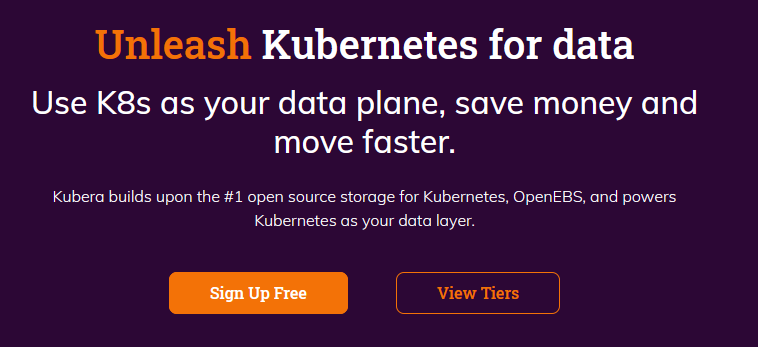
TL;DR - Kubera is SaaS that makes it easy to use Kubernetes itself as your data layer. It is free forever for individual use. Get started ➡️ Kubera.mayadata.io
MayaData built Kubera to help you to bring your data layer to your Kubernetes platform and abstract data dependencies on any cloud or onprem. Now, let’s get to the technical talk 👨💻.
Before Starting
All you need is a Kubernetes cluster and Kubera account to start with. Kubernetes provide platform abstraction, cloud native software runs and behaves the same whether it is on a hosted Kubernetes service like AWS EKS, Google Cloud GKE, Microsoft AKS, DigitalOcean Kubernetes Service or self managed distributions based on Red Hat OpenShift and Rancher. I don’t need to mention here that you can also use your favorite Certified Kubernetes Installer like kubeadm, kops, kubespray, minikube,etc.
Since you made it here, we assume you already have one configured. MayaData team has proudly over 50 CKAs, years of experience in building for enterprises and running Kubernetes in production. If you need professional help to decide, we can connect you with one of our trusted partners. In case you want to learn more, just schedule a call with us and I will send you a copy of my newly published book Kubernetes - A Complete DevOps Cookbook.
Installing dataplane using Kubera
We will be using a Kubernetes cluster deployed on AWS during this guide. This guide will help you to add your cluster to Kubera, install OpenEBS Enterprise Edition and create a storage pool to be consumed by your workload. Let’s review our setup used for the configuration:
- 3 Nodes in AWS (3x m5a.large)
- 2 vCPUs / node
- 8 GiB memory / node
- 2x 100 GiB volumes / node
Before you start, make sure iSCSI client (initiator) packages (open-iscsi or iscsi-initiator-utils). If you are going to deploy RWX volumes also make sure NFS client binaries (nfs-common) required for nfs-provisioner are installed on your worker nodes.
Login to your free Kubera account:
- Follow the instructions to connect your cluster to your Kubera account:
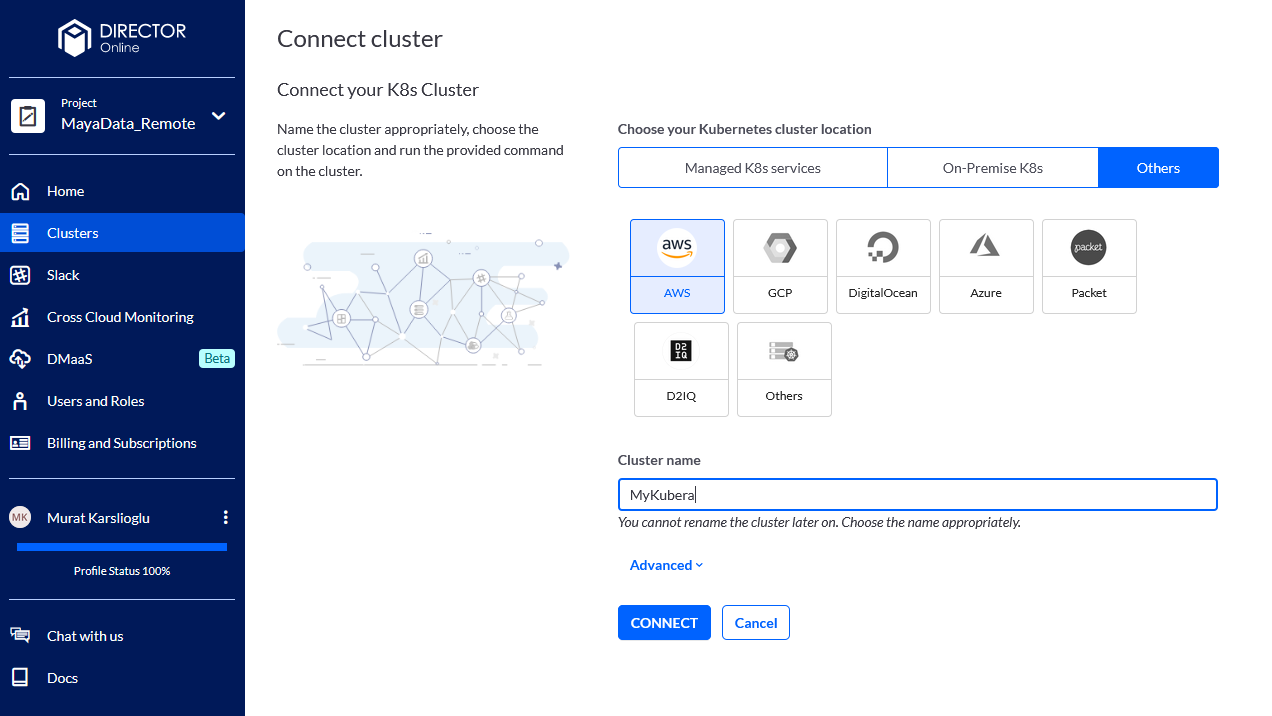
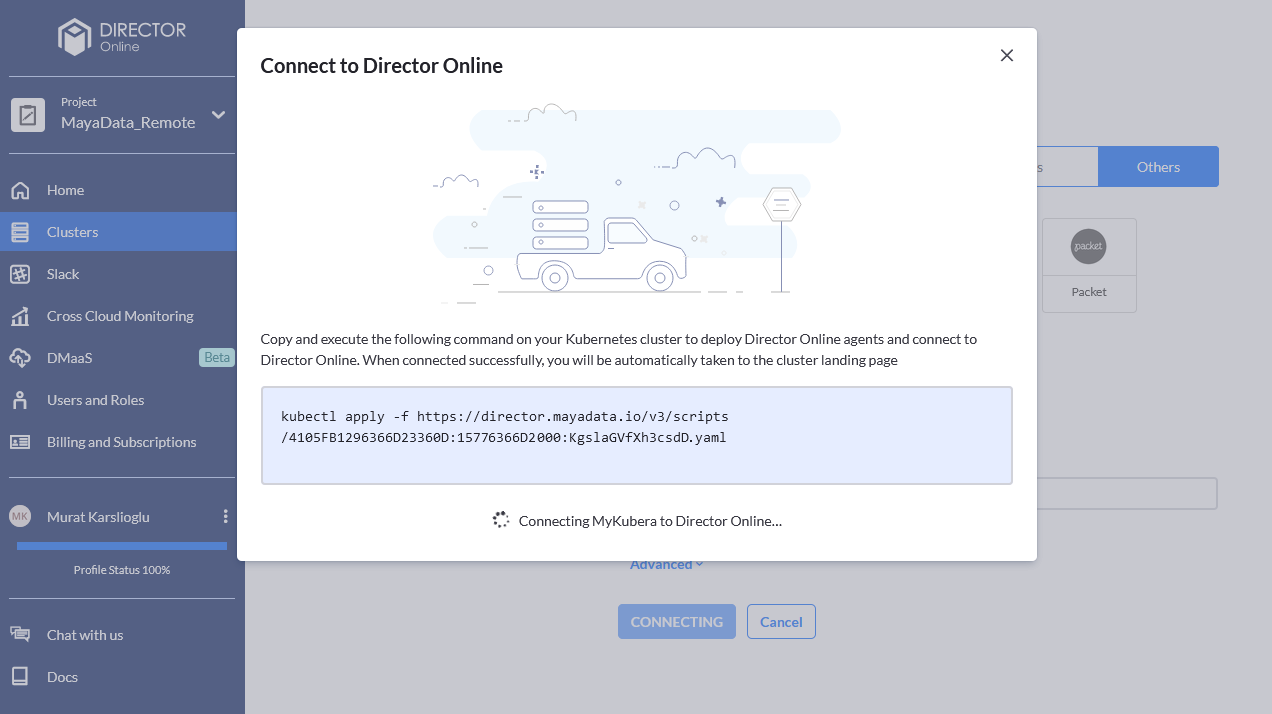
- Copy and execute the command on your own Kubernetes cluster:
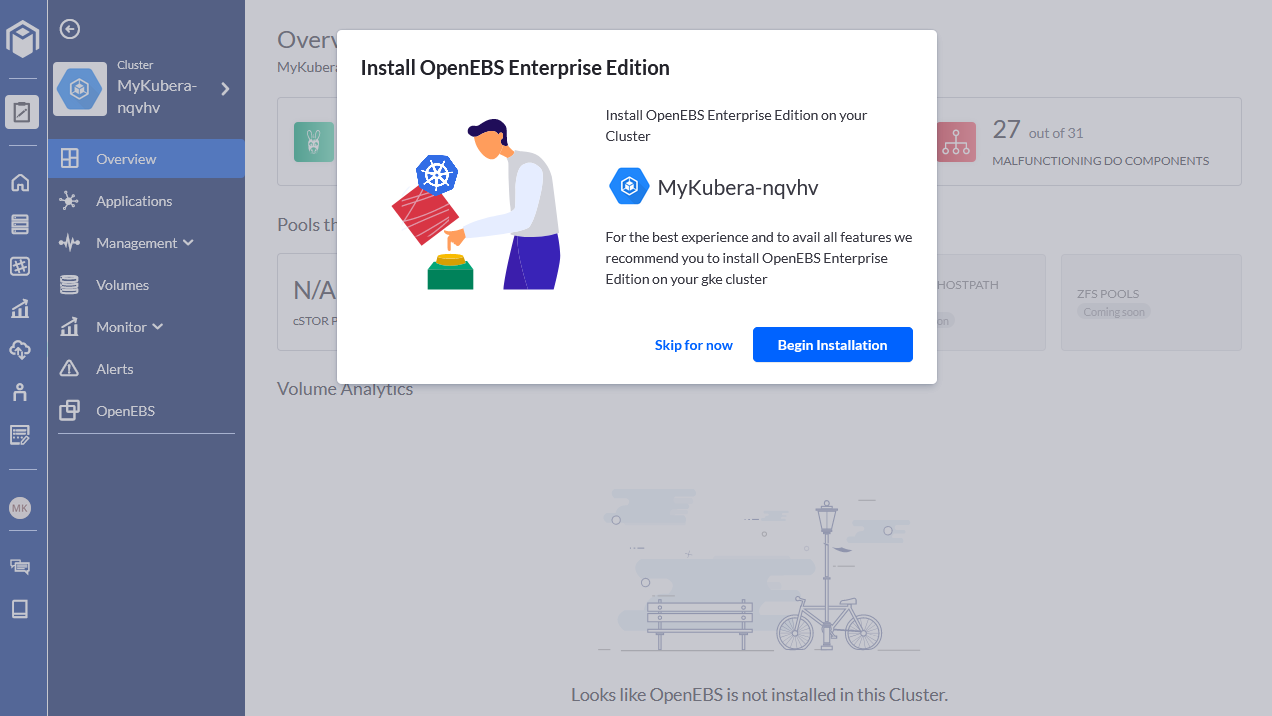
One important component Kubera introduces is the enterprise hardened, platform validated and long-term enterprise-support backed edition of OpenEBS called OpenEBS Enterprise Edition. It is based on the same 100% open source code. MayaData built extensive list of E2E and platform validation to make sure a release is compliant with your platform or naturally evolving Kubernetes APIs. - Now, follow the basic installation setup to install OpenEBS Enterprise Edition on your cluster:
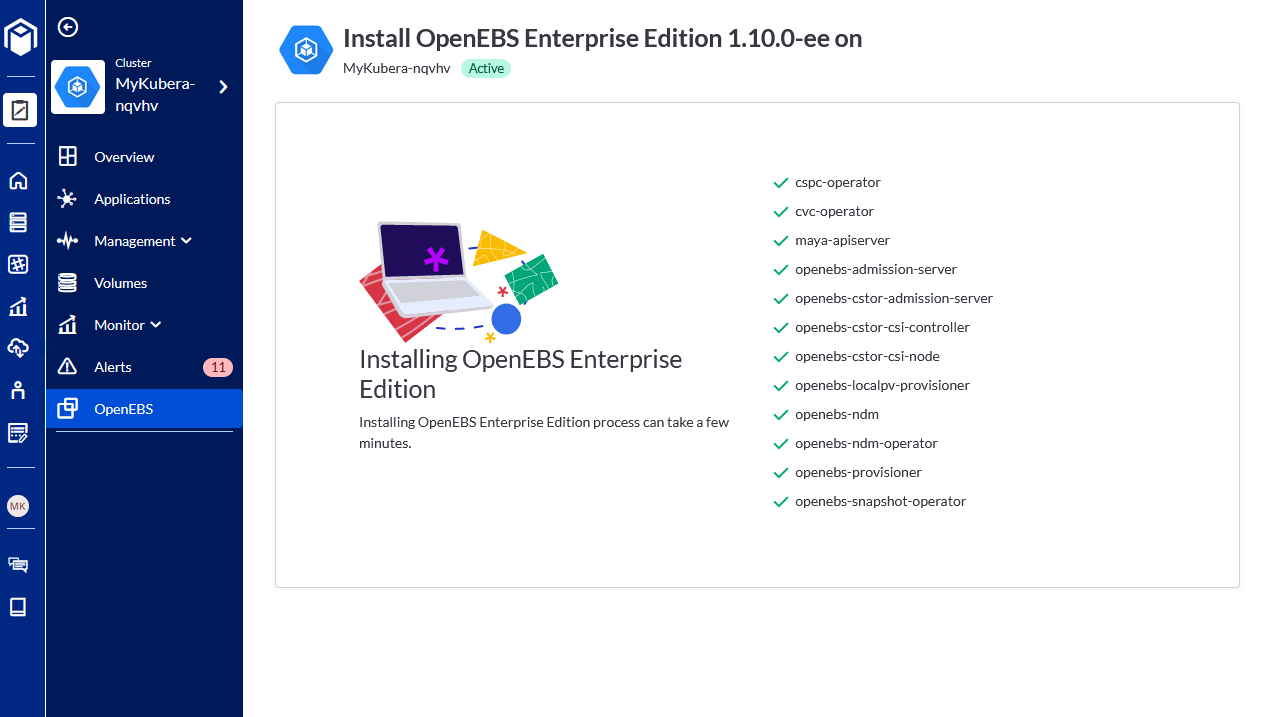
- The installation will complete the deployment of OpenEBS Enterprise Edition components shortly:
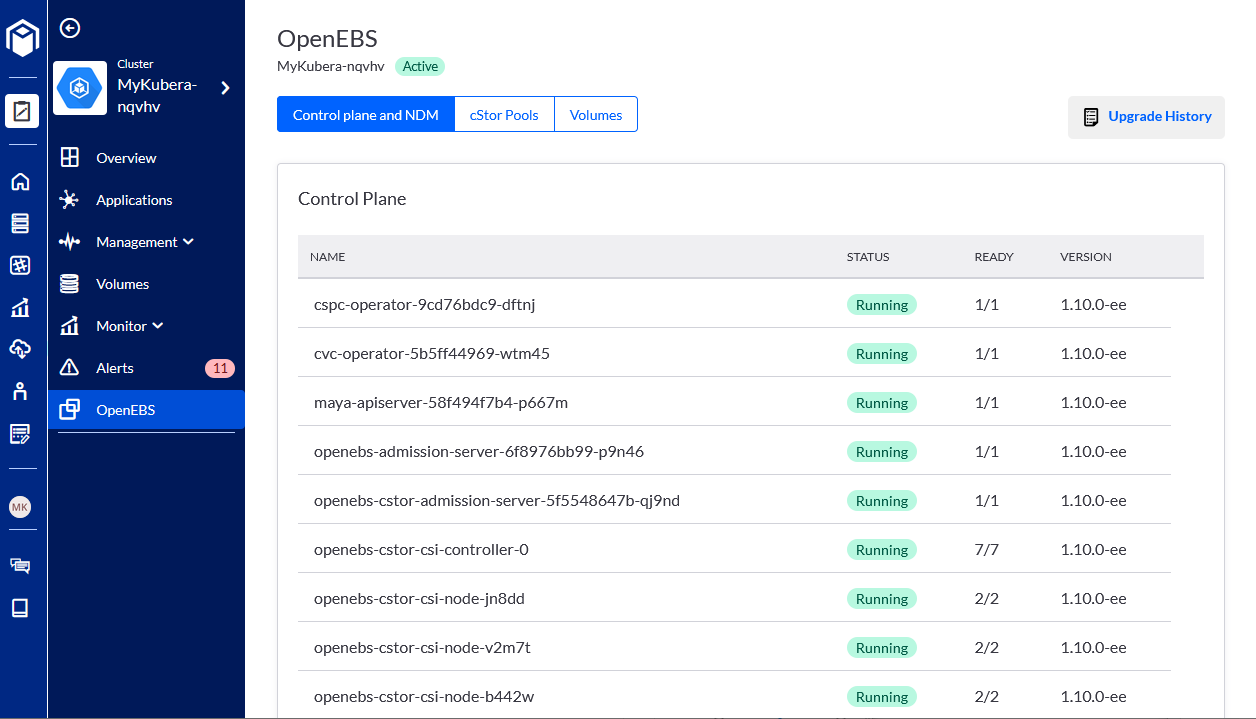
- Once complete, you will see OpenEBS control-plane enabled on your cluster:
Attaching disks to nodes
Now we will add two additional devices to each node. Disks will be later consumed in your first cloud-native storage pool. This step can be done through your cloud vendor's web user interface, or if you are running in a VM, you can use your hypervisor to add two additional virtual devices to each node. In this example, we have used AWS and added the disks using the AWS CLI tool.
Get list of InstanceId:$ aws ec2 describe-instances --region us-east-1 --instance-ids |grep InstanceId
"InstanceId": "i-0cd445e7ca521fc37",
"InstanceId": "i-0977304f66206fc2e",
"InstanceId": "i-0fa3e88de9b48cde1",$ aws ec2 create-volume --volume-type gp2 --size 100 --region us-east-1 --availability-zone us-east-1a
{
"AvailabilityZone": "us-east-1a",
"CreateTime": "2020-05-20T21:23:08.000Z",
"Encrypted": false,
"Size": 100,
"SnapshotId": "",
"State": "creating",
"VolumeId": "vol-064eb8e0dbb8ce05b",
"Iops": 300,
"Tags": [],
"VolumeType": "gp2"
}
# Disk 1 to worker node 1
$ aws ec2 attach-volume --volume-id vol-064eb8e0dbb8ce05b --instance-id i-0977304f66206fc2e --device /dev/sdf
# Disk 2 to worker node 1
$ aws ec2 attach-volume --volume-id vol-0c14266e24b98c637 --instance-id i-0977304f66206fc2e --device /dev/sdg
# Disk 3 to worker node 2
$ aws ec2 attach-volume --volume-id vol-00bac9f9d7a623fc7 --instance-id i-0fa3e88de9b48cde1 --device /dev/sdf
# Disk 4 to worker node 2
$ aws ec2 attach-volume --volume-id vol-06adf03dc10d30e42 --instance-id i-0fa3e88de9b48cde1 --device /dev/sdg
# Disk 5 to worker node 3
$ aws ec2 attach-volume --volume-id vol-034975e2be74e83f7 --instance-id i-01625c00d97cbbc89 --device /dev/sdf
# Disk 6 to worker node 3
$ aws ec2 attach-volume --volume-id vol-00549c87fd774d0b8 --instance-id i-01625c00d97cbbc89 --device /dev/sdg
Creating storage pools using Kubera
In this section we will create a storage pool for your stateful workloads. OpenEBS is granular storage solution with a few storage engine options. You can read about the difference between Jiva, cStor and Dynamic Local PV here. In this guide, we will use cStor since we are taking advantage of disk pooling capabilities and later in the series we will talk about block-based scheduled backup functionality.
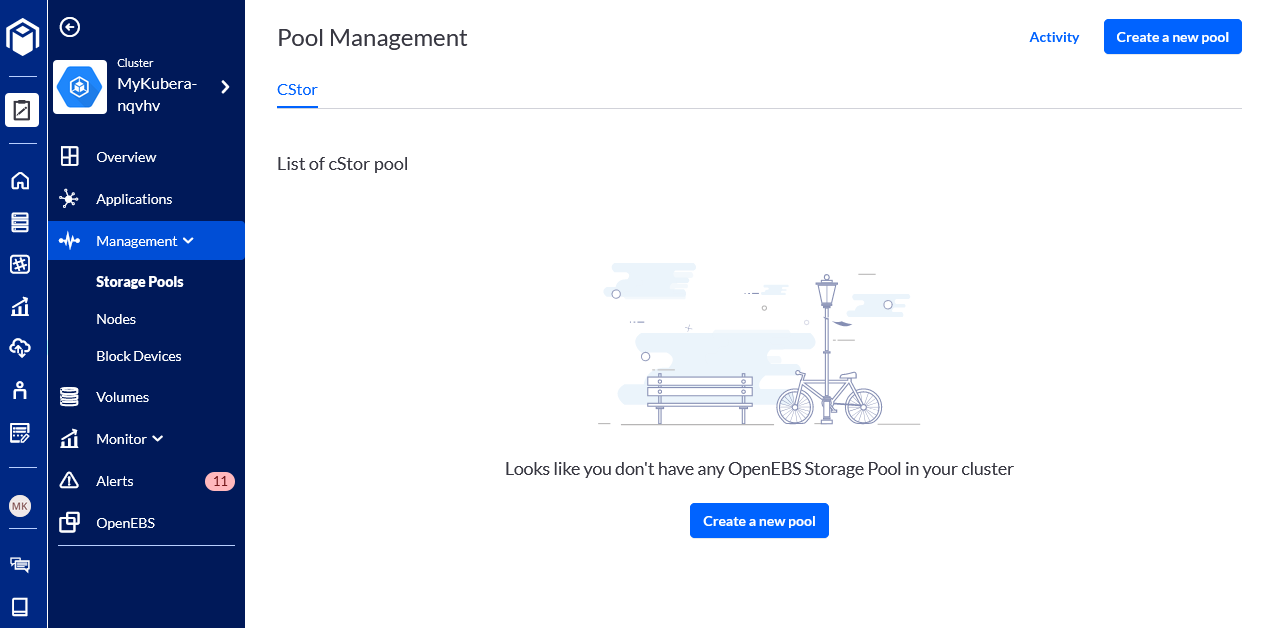
You can create cStor pool direct from Kubera interface under Management > Storage Pools menu.
- Click on Create a new pool button to start:
- Choose the CStor storage pool type:
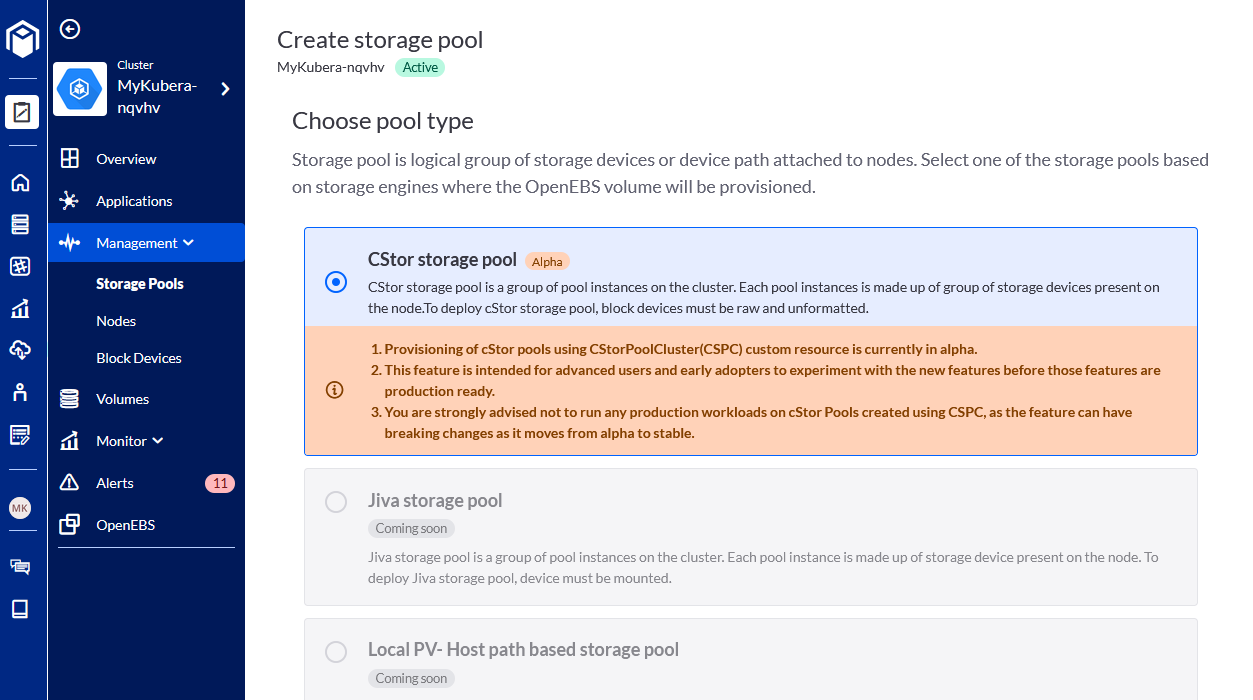
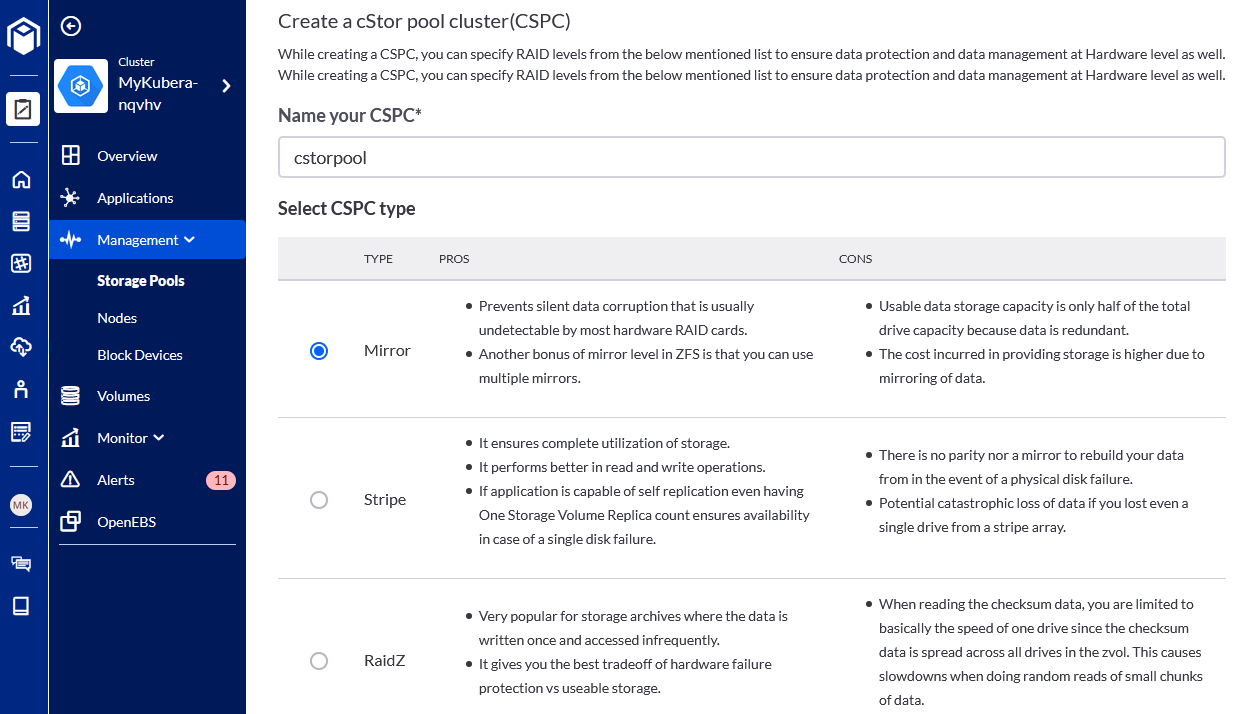
- Name your cStor pool cluster cstorpool and select a RAID level (Mirror, since we have added only two devices to each node in our example). RAID level selection here applies at node-level, replication is defined in the storage class definition. For example, you can choose Stripe, continue to add additional disks later to increase pool size and still have high availability by choosing 3-way replication at cluster-level:
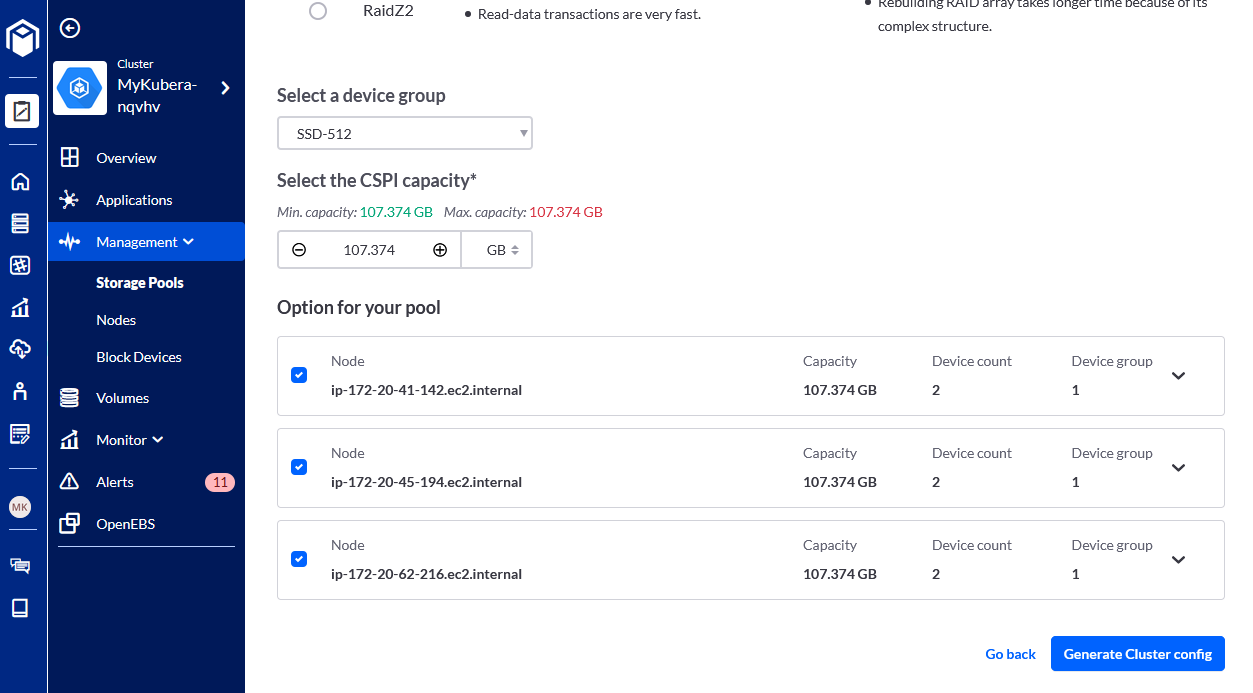
- Scroll down, use all capacity and select all worker nodes detected with 2 devices. Finally, click on the Generate Cluster config button:
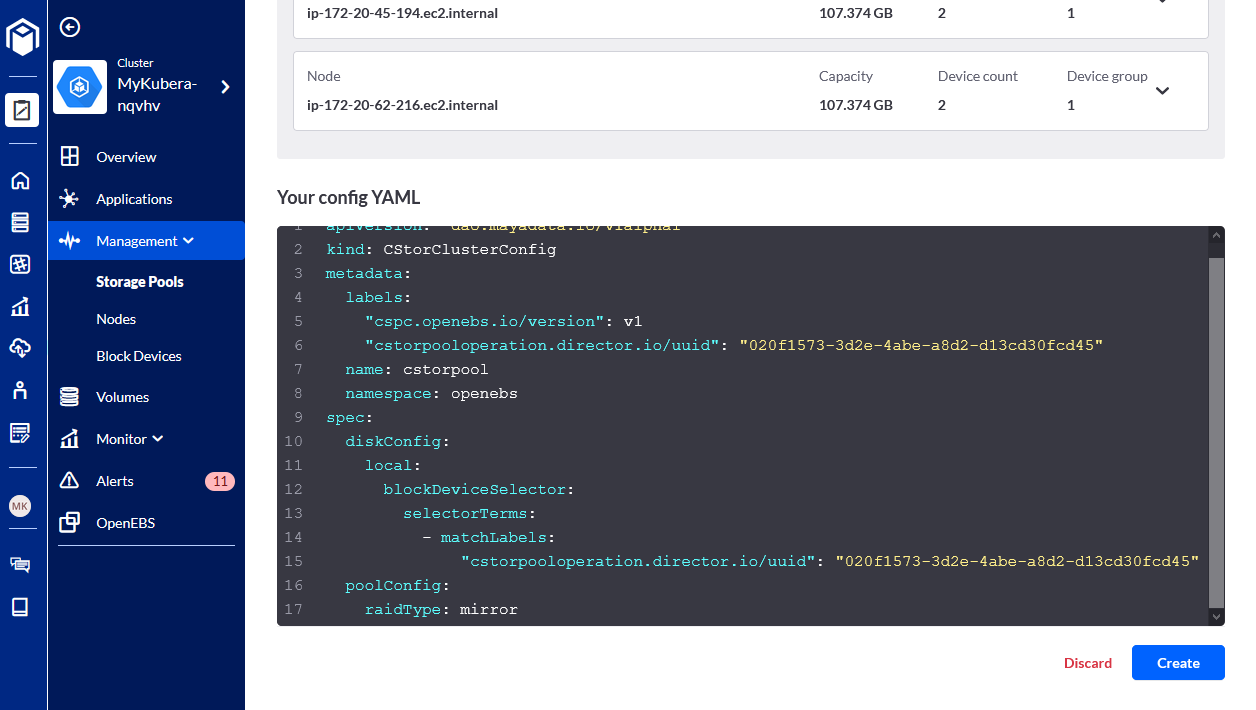
- Once the cluster config YAML is generated click on Create to apply changes:
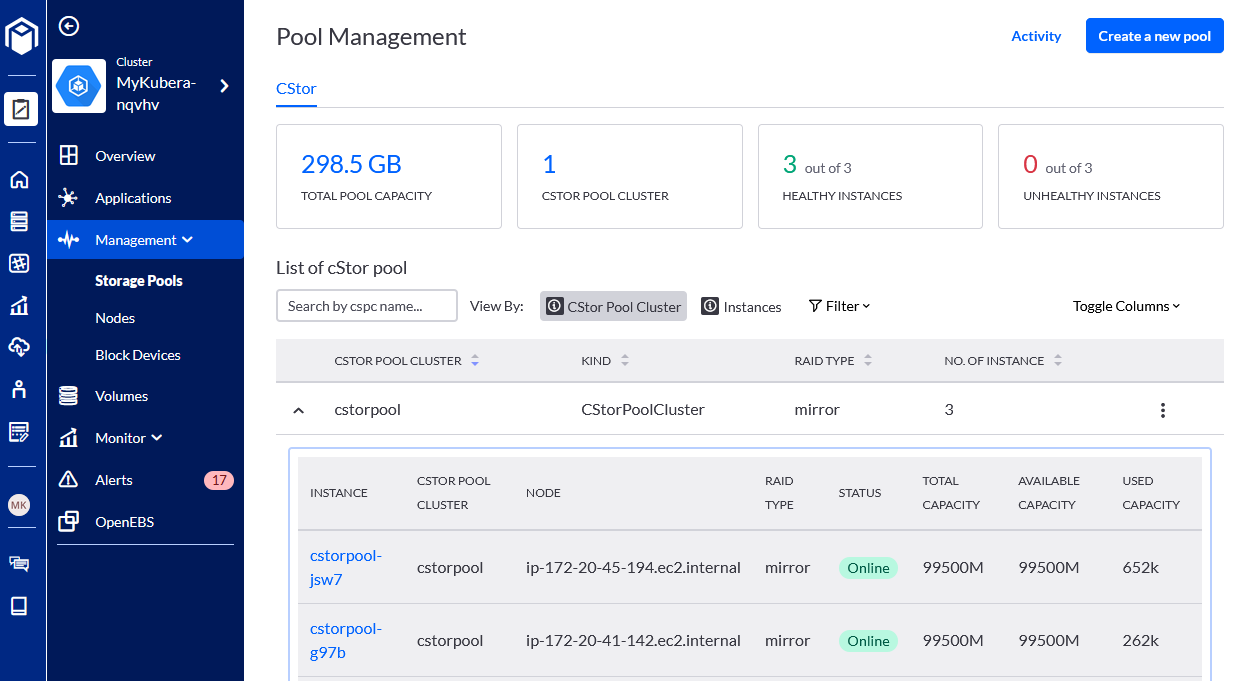
- When a new storage pool is created you will see the summary and available capacity under Storage Pools menu:
Create a Storage Class
Replace the cstorPoolCluster value below with your pool name and run the command below to create a Storage Class that we will later use to create 3-way replicated persistent volumes (PV):
$ cat EOF | kubectl apply -f -
kind: StorageClass
apiVersion: storage.k8s.io/v1
metadata:
  name: openebs-csi-cstor-disk
provisioner: cstor.csi.openebs.io
allowVolumeExpansion: true
parameters:
  cas-type: cstor
  replicaCount: "3"
  cstorPoolCluster: cstorpool
EOF
Setting OpenEBS Storage Class as default
Change the default storage class from your current setting to OpenEBS. For example, in our case, using AWS default storage class is set to gp2.
- Unset the default gp2 storage class:
$ kubectl patch storageclass gp2 -p '{"metadata":{"annotations":{"storageclass.beta.kubernetes.io/is-default-class":"false"}}}' - Now define openebs-csi-cstor-disk as the default StorageClass:
$ kubectl patch storageclass openebs-csi-cstor-disk -p '{"metadata":{"annotations":{"storageclass.kubernetes.io/is-default-class":"true"}}}'
Verify default Storage Class
List the storage classes and verify openebs-csi-cstor-disk is set to default:
$ kubectl get sc
NAME                           	PROVISIONER                                            	AGE
default                        	kubernetes.io/aws-ebs                                  	19m
gp2                            	kubernetes.io/aws-ebs                                  	19m
openebs-csi-cstor-disk (default)   cstor.csi.openebs.io                                   	29s
openebs-device                 	openebs.io/local                                       	7m4s
openebs-hostpath               	openebs.io/local                                       	7m4s
openebs-jiva-default           	openebs.io/provisioner-iscsi                           	7m6s
openebs-snapshot-promoter      	volumesnapshot.external-storage.k8s.io/snapshot-promoter   7m5s
Optional: Deploy NFS Provisioner for RWX mode
This is an optional step, in case you are going to deploy workloads like Wordpress or Magento that can take advantage of ReadWriteMany (RWX) mode persistent volumes.
Create a namespace, in our example nfs-workloadname.$ kubectl create ns nfs-workloadname$ helm install stable/nfs-server-provisioner --namespace=nfs-workloadname --name=openebs-nfs-magento --set=persistence.enabled=true,persistence.storageClass=openebs-csi-cstor-disk,persistence.size=50Gi,storageClass.name=nfs-sc1,storageClass.provisionerName=openebs.io/nfsThis will create a storage class for creating your PersistentVolumeClaim (PVC) with the correct storageClassName attribute. For example:
---
kind: PersistentVolumeClaim
apiVersion: v1
metadata:
  name: test-dynamic-volume-claim
spec:
  storageClassName: "nfs-sc1"
  accessModes:
    - ReadWriteOnce
  resources:
    requests:
      storage: 100Mi
$ kubectl get sc
NAME                               PROVISIONER                                                AGE
default                            kubernetes.io/aws-ebs                                      13h
gp2                                kubernetes.io/aws-ebs                                      13h
Nfs-sc1                            openebs.io/nfs                                             44s
openebs-csi-cstor-disk (default)   cstor.csi.openebs.io                                       6m45s
openebs-device                     openebs.io/local                                           3h1m
openebs-hostpath                   openebs.io/local                                           3h1m
openebs-jiva-default               openebs.io/provisioner-iscsi                               3h1m
openebs-snapshot-promoter          volumesnapshot.external-storage.k8s.io/snapshot-promoter   3h1m
Deploy your application
Now either use your preferred method (aka the YAML or Helm way) providing the storage class you have created above or follow one of our step-by-step stateful workload deployment guides listed below to get your applications up and running.
- Deploying Kafka on Kubernetes
- Deploying ElasticSearch / EFK on Kubernetes
- Deploying Magento on Kubernetes
- Deploying Cassandra on Kubernetes
What is Next?
Next in the Easy way with Kubera series, we will discuss the topics below:
- Kubera: MayaData's unique cloud native approach to back-ups
- Kubera: Easy Onboarding
- Getting workload metrics on K8s should be easier
- Using live support and knowledge base to address stateful workload questions
- Troubleshooting Service Mesh health
- Using Kubera off-cluster logs archives
Some Useful Links:
Blog - Announcing Kubera
Sign up for Kubera
MayaData Resources
Kubera Help Center


Game changer in Container and Storage Paradigm- MayaData gets acquired by DataCore Software
Don Williams
Don Williams
Managing Ephemeral Storage on Kubernetes with OpenEBS
Kiran Mova
Kiran Mova
Understanding Persistent Volumes and PVCs in Kubernetes & OpenEBS
Murat Karslioglu
Murat Karslioglu