

In this blog, I will be explaining how to deploy an application in a custom Rancher cluster on an OpenEBS volume. OpenEBS is a leading open-source storage platform that provides persistent and containerized block storage for DevOps and container environments.
.png?width=2400&name=Untitled%20design%20(10).png) Running OpenEBS On Custom Rancher Cluster
Running OpenEBS On Custom Rancher ClusterRancher is an enterprise management for Kubernetes. Before you begin, please make sure all the prerequisites are met.
Node Requirements:
- Ubuntu 16.04(64-bit)
- 4 vCPUS and 16 GB RAM
- Docker 17.03.2
Prerequisites:
- Rancher 2.0 UI installed and running.
After the installation of docker, I used the below command to install Rancher. For more information on installing Rancher visit Rancher docs at https://rancher.com/docs/rancher/v2.x/en/
| docker run -d --restart=unless-stopped \ -p 8080:80 -p 8443:443 \ rancher/rancher:latest |
- Minimum of 1 master and 3 worker
- (Optional) 6 nodes for the cluster ( 3 master and 3 workers)
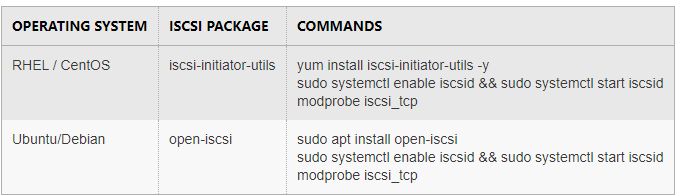
iSCSI services on different Operating System:
Step1: Verify iSCSI initiator is installed and services are running
Step2: Add extra_binds under kubelet service in cluster YAML
After installing the initiator tool on your nodes, edit the YAML for your cluster, editing the kubelet configuration to mount the iSCSI binary and configuration, as shown in the sample below.
| services: kubelet: extra_binds: - "/etc/iscsi:/etc/iscsi" - "/sbin/iscsiadm:/sbin/iscsiadm" - "/var/lib/iscsi:/var/lib/iscsi" - "/lib/modules" |
Load iscsi_tcp module:
The above step may remove the iscsi_tcp probe and after a reboot, the node will not start the iscsi_tcp service, and OpenEBS volume mount will fail. It should be the same with the command below.
| lsmod | grep iscsi |
Sample Output:
| root@worker113:~# lsmod | grep iscsi iscsi_tcp 20480 0 libiscsi_tcp 24576 1 iscsi_tcp libiscsi 53248 2 libiscsi_tcp,iscsi_tcp scsi_transport_iscsi 98304 2 libiscsi,iscsi_tcp |
If your output is similar to thesample above, then you are good to go. If your output doesn’t have iscsi_tcp you need to follow below steps to load the iscsi_tcp module.
| modprobe iscsi_tcp |
You can verify the same from the command below. Now the output should be similar to the sample output mentioned above
| lsmod | grep iscsi |
Persist iscsi_tcp module to load after reboot:
You can make the kernel load iscsi_tcp automatically every time the node reboots by appending the line iscsi_tcp in /etc/ modules.
Example:
# /etc/modules: kernel modules to load at boot time.## This file contains the names of kernel modules that should be loaded# at boot time, one per line. Lines beginning with “#” are ignored.iscsi_tcp
Now ifall prerequisites have been met, go ahead with setting up the cluster. You can go directly to deploy OpenEBS section if you already have a k8s cluster.
Creating a Custom k8s cluster on Rancher:
- Once you have deployed Rancher you should be able to access the UI. Login to your rancher UI using your credentials

- Now click on the global tab and then click on add cluster button. We should see the add cluster window.
Example:
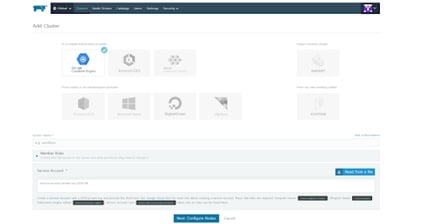
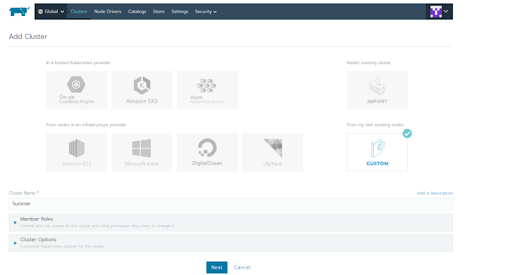
- Under the add cluster option click on the custom. Then give the cluster a name. You can customize the cluster under Cluster Options. You can choose kubernetes version, Network provider and other options. Here I have selected Kubernetes Version as V.1.11.2-rancher1–1, Network provider as Canal and Cloud Provider as none.
Example:

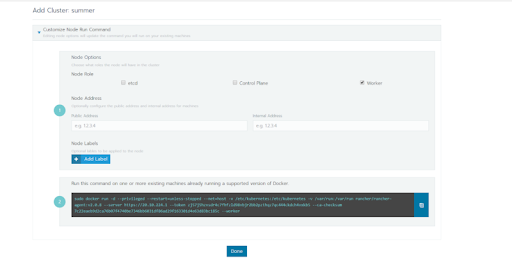
- Now, click on next button; it will open another page. In this page, you can select node role like etcd/ Control Plane / Worker. Click on “Show advanced options.” Now add the i/p address of the node in the Internal Address section.
Example:
- Copy the command mentioned in the page to the node, which will be added to the cluster. Once you run the command, the page will show 1 new node registered.
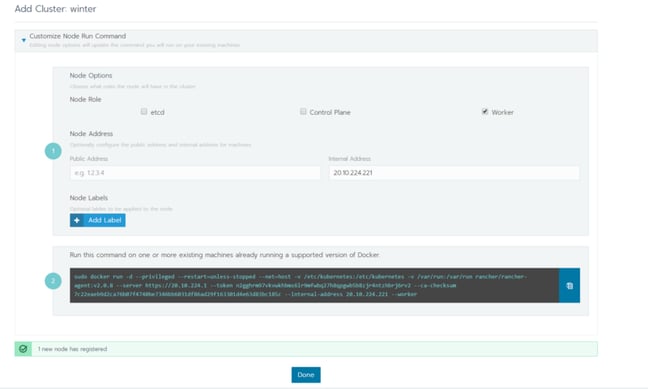
- Now click on Done. Follow the same process to add more nodes to the cluster.
- Once all the nodes are added, you can deploy OpenEBS on the cluster.
Deploy OpenEBS:
Note: Ensure that you have met the prerequisites before installation.
The latest version of OpenEBS, i.e., 0.7 can be installed using the below steps.
| kubectl apply -f https://openebs.github.io/charts/openebs-operator-0.7.0.yaml |
Select Your Storage Engine:
You can now choose the storage engine to provision Jiva or cStor volumes. As a cluster admin, you can provision jiva or cStor based on your requirements.
Here I am going to use Jiva storage engine.
Provisioning Jiva Storage Engine:
Jiva can be provisioned in your Kubernetes cluster by using the following procedure.
Verify if the OpenEBS installation is complete.
OpenEBS pods are created under “openebs” namespace, default Storage Pool and default Storage Classes are created after installation.
You can get the OpenEBS pods status by running following command
| kubectl get pods -n openebs |
You can use the default Jiva storage class in your application yaml to run the application. You can get the storage classes that are already created by using the following command.
| kubectl get sc |
Following is an example output.
|
NAME PROVISIONER AGE |
OpenEBS installation will create Jiva storage pool also. It will be created by default on “/var/openebs” inside the hosted path on the nodes.
You can get the storage pool details by running the following command.
| kubectl get sp |
Following is an example output.
| NAME AGE cstor-sparse-pool-gjo0 5m cstor-sparse-pool-str9 5m cstor-sparse-pool-x4dm 5m default 5m |
From the above output, cstor-sparse-pools are default cstor engine pools whereas default is the jiva storage engine default pool.
Deploying applications on OpenEBS:
Now I will deploy Percona DB on OpenEBS volume.
You can get the percona deployment yaml from the command below:
| wget https://raw.githubusercontent.com/openebs/openebs/master/k8s/demo/percona/ percona-openebs-deployment.yaml |
You have to edit the percona-openebs-deployment.yaml to use the jiva storage engine.
Use vi command to edit the yaml file. Inside the yaml file under the PersistentVolumeClaim section, you have to update the storageClassName. You have to use the openebs-jiva-default storage class.
Example:
|
kind:PersistentVolumeClaim |
Run the below command to deploy percona application.
| kubectl apply -f percona-openebs-deployment.yaml |
Run the below command to check percona pods should be running now.
| kubectl get pods |
Example Scenario 1:
| NAME READY STATUS RESTARTS AGE default-demo-vol1-claim-3213556361-ctrl-c96bdd757–4fhqq 2/2 Running 0 2m default-demo-vol1-claim-3213556361-rep-58b96b64d6-glkbs 1/1 Running 0 2m default-demo-vol1-claim-3213556361-rep-58b96b64d6-jxwvr 1/1 Running 0 2m default-demo-vol1-claim-3213556361-rep-58b96b64d6-stcbb 1/1 Running 0 2m percona-86d6cf8547–7t6bz 1/1 Running 0 2m |
Now we are running an application successfully on an OpenEBS volume on a Rancher custom cluster.
Troubleshooting:
If application pod is stuck in containercreating for more time you have to follow the below steps:
Example Scenario 2:
| NAME READY STATUS RESTARTS AGE default-demo-vol1-claim-3213556361-ctrl-c96bdd757–4fhqq 2/2 Running 0 2m default-demo-vol1-claim-3213556361-rep-58b96b64d6-glkbs 1/1 Running 0 2m default-demo-vol1-claim-3213556361-rep-58b96b64d6-jxwvr 1/1 Running 0 2m default-demo-vol1-claim-3213556361-rep-58b96b64d6-stcbb 1/1 Running 0 2m percona-86d6cf8547–7t6bz 1/1 ContainerCreating 0 2m |
Cause:
- As part of the startup of the node, iscsi was already installed and running on the node.
- Kubelet startup doesn’t start the iscsid as it is already running on the node.
- When volume login is initiated, iscsiadm from kubelet is trying to contact the iscsid (running on the host) to initiate the connection. The version doesn’t match that results in an error from iscsid to iscsiadm and prints 12 — module not loaded.
Recovery Step:
- Refer to the remove iscsiadm section in pre-requisites
After rebooting the nodes, the pods will stick again in containercreating state.
Cause:
- After reboot, the kernel may not load the iscsi_tcp module automatically.
Recovery Step:
Refer to the persist iscsi_tcp module to load after reboot section in pre-requisites section.
Hopefully, this will help you to configure OpenEBS on top of Rancher 2.0. Thank you for reading and please provide any feedback below or on twitter. For more details on OpenEBS installation and troubleshooting visit https://docs.openebs.io/.
This article was first published on Oct 22, 2018 on MayaData's Medium Account


Game changer in Container and Storage Paradigm- MayaData gets acquired by DataCore Software
Don Williams
Don Williams
Managing Ephemeral Storage on Kubernetes with OpenEBS
Kiran Mova
Kiran Mova
Understanding Persistent Volumes and PVCs in Kubernetes & OpenEBS
Murat Karslioglu
Murat Karslioglu