

It’s been some time since I wrote about IBM Cloud Private 2.1, although I’ve been heavily using it in my lab.
Improvements from version 1.2 to 2.1 were massive. We have also noticed the changes in the OpenEBS user community, according to our surveys usage of ICP increased dramatically. The Community Edition of the ICP 3.1 came out three weeks ago. CE container images were released with a slight delay of two weeks after the enterprise version announced. And I believe that it deserves an updated blog to talk about the steadily advancing developer experience (and my favorite new features).
In this blog, I will provide step-by-step instructions on how to configure a Kubernetes-based managed private cloud using ICP. I will also highlight the top improvements since the last version that makes me excited.
Quick note: Developers who use only public cloud ask me this question frequently, “Why would you need a private cloud, and maintain it, everything on the public cloud is much easier?”. Well, you are probably not the one paying the cloud bill, right? For various tests, (some running IO intensive workloads) and learning experiments, I maintain 4 clusters (IBM Cloud Private, Rancher, Red Hat OpenShift and one installed with kubeadm) — each 3–5 nodes. That’s 16–20 nodes, exactly $1,069.05/month — I learned it all the hard way. True that education is expensive, but running the same on a few cheap servers adds only ~$135/month to my electric bill — soon will be almost free thanks to the solar panels ;)
When it’s not enough I also use StackPointCloud to deploy temporary clusters on AWS or GKE, etc, but I never keep them overnight unless I have to.
On-premise turnkey solutions that allow me to create Kubernetes clusters on my internal, secure, cloud network with only a few commands like IBM Cloud Private makes my live really easy.
Now, let’s take a look at the requirements.
Prerequisites
Minimum requirements for a multi-node community edition cluster:
Hardware
- Boot node: 1x 1+ core(s) >= 2.4 GHz CPU, 4GB RAM, >=100 GB disk space
- Master node: 1x 8+ cores >= 2.4 GHz CPU, 16+GB RAM, >=200 GB disk space
- Proxy node: 1 or more 2+ cores >= 2.4 GHz CPU, 4GB RAM, >=150 GB disk space
- Worker node: 1 or more 1+ cores >= 2.4 GHz CPU, 4GB RAM, >=150 GB disk space
Since I’m using the Community Edition this time, I will be using single master and multiple workers configuration.
Software
- Ubuntu 16.04 LTS (18.04 LTS and RHEL 7.x is also supported)
- Docker 18.03.1-ce
- IBM Cloud Private 3.1
How to install IBM Cloud Private-CE 3.1
If you are already using the older version of the ICP you can skip the cluster preparation steps and jump to the “Install IBM Cloud Private-CE 3.1” section after uninstalling the older version as described under “Uninstalling an older version of the IBM Cloud Private” section.
We need a few things installed before we get up and running with ICP 3.1. First, I’ll configure my Ubuntu servers and share SSH keys, so the master node can access all my other nodes. Then I’ll install Docker and after that ICP. From there, ICP will take care of my Kubernetes cluster installation.
Install the base O/S — Ubuntu (30–45mins)
Download your preferred version of Ubuntu. I use Ubuntu Server 16.04.3 LTS.
Install Ubuntu on all servers with default options. I used user/nopassword as username/password for simplicity.
Log in to your Ubuntu host via terminal.
Edit the /etc/network/interfaces file, assign a static IP and set a hostname.
Edit the /etc/hosts file, add your nodes to the list, and make sure you can ping them by the hostname:
cat /etc/hosts
For my setup, this is how hosts file looks like:
$ cat /etc/hosts
 127.0.0.1 localhost
 # 127.0.1.1 icp3101# The following lines are desirable for IPv6 capable hosts
 #::1 localhost ip6-localhost ip6-loopback
 ff02::1 ip6-allnodes
 ff02::2 ip6-allrouters
 10.10.0.161 icp3101
 10.10.0.162 icp3102
 10.10.0.163 icp3103
 10.10.0.164 icp3104
 10.10.0.165 icp3105
Ping nodes by hostname to make sure all are accessible:
$fping icp21032 icp21033 icp21034 icp21035
 icp21032 is alive
 icp21033 is alive
 icp21034 is alive
 icp21035 is alive
On your Ubuntu host, install the SSH server:
sudo apt-get install openssh-serverNow, you should be able to access your servers using SSH. Check the status by running:
$ sudo service ssh status
 ● ssh.service — OpenBSD Secure Shell server
 Loaded: loaded (/lib/systemd/system/ssh.service; enabled; vendor preset: enabled)
 Active: active (running) since Mon 2018–10–08 07:16:37 PDT; 8h ago
 Main PID: 1160 (sshd)
 Tasks: 1
 Memory: 6.8M
 CPU: 45.454s
 CGroup: /system.slice/ssh.service
 └─1160 /usr/sbin/sshd -D
Install open-iscsi and curl if it’s not already installed:
sudo apt install curl open-iscsiRepeat above steps on all servers.
Now, you need to share SSH keys among all nodes:
Log in to your first node, which will be the boot node (ubuntu36), as root.
Generate an SSH key:
ssh-keygen -b 4096 -t rsa -f ~/.ssh/master.id_rsa -N “”Add the SSH key to the list of authorized keys:
cat ~/.ssh/master.id_rsa.pub | sudo tee -a ~/.ssh/authorized_keysFrom the boot node, add the SSH public key to other nodes in the cluster:
ssh-copy-id -i ~/.ssh/master.id_rsa.pub root;Repeat for all nodes.
Log in to the other nodes and restart the SSH service:
sudo systemctl restart sshdNow the boot node can connect through SSH to all other nodes without the password.
Install Docker CE (5mins)
To get the latest supported version of Docker, install it from the official Docker repository.
On your Ubuntu nodes, update the apt package index:
sudo apt-get updateMake sure below packages are installed:
sudo apt-get install \
apt-transport-https \
ca-certificates \
software-properties-common
Add Docker’s GPG key:
curl -fsSL https://download.docker.com/linux/ubuntu/gpg | sudo apt-key add -Add the repository:
sudo add-apt-repository \
“deb [arch=amd64] https://download.docker.com/linux/ubuntu \
$(lsb_release -cs) \
stable”
Update the apt package index:
sudo apt-get updateCheck the available versions:
apt-cache madison docker-ceInstall Docker CE 18.0.3.1:
sudo apt-get install docker-ce=18.03.1~ce-0~ubuntuMake sure it’s up and running after installation is complete:
$ sudo systemctl status docker
 ● docker.service — Docker Application Container Engine
 Loaded: loaded (/lib/systemd/system/docker.service; enabled; vendor preset: enabled)
 Active: active (running) since Mon 2018–10–08 07:17:42 PDT; 8h ago
 Docs: https://docs.docker.com
 Main PID: 1165 (dockerd)
 Tasks: 1442
 Memory: 7.2G
 CPU: 55min 10.946s
 CGroup: /system.slice/docker.service
Install IBM Cloud Private-CE 3.1 (60–75 mins)
Download the IBM Cloud Private-CE container images:
sudo docker pull ibmcom/icp-inception:3.1.0Create an installation folder for configuration files and extract the sample config file:
mkdir /opt/ibm-cloud-private-ce-3.1.0; \
cd /opt/ibm-cloud-private-ce-3.1.0
sudo docker run -e LICENSE=accept \
-v “$(pwd)”:/data ibmcom/icp-inception:3.1.0 cp -r cluster /data
Above command creates the cluster directory under /opt/ibm-cloud-private-ce-3.1.0 with the following files: config.yaml, hosts, and ssh_key. Before deploying ICP, these files need to be modified.
Replace the ssh_key file with the private SSH key you have created earlier.
sudo cp ~/.ssh/master.id_rsa /opt/cluster/ssh_keyAdd the IP address of all your nodes to the hosts file in the /opt/ibm-cloud-private-ce-3.1.0/cluster directory. If you plan to run serious workloads, I recommend separating master and worker Kubernetes nodes. Since Community Edition supports single master node only, my config file looks like this:
$ cat /opt/ibm-cloud-private-ce-3.1.0/cluster/hosts
[master]
10.10.0.161[worker]
10.10.0.161
10.10.0.162
10.10.0.163
10.10.0.164
10.10.0.165[proxy]
10.10.0.161#[management]
#4.4.4.4#[va]
#5.5.5.5
Finally, deploy the environment. Change directory to the cluster folder with the config.yaml file and deploy your ICP environment:
sudo docker run — net=host -t -e LICENSE=accept \
-v “$(pwd)”:/installer/cluster ibmcom/icp-inception:3.1.0 install
Note: I have tried to deploy 3.1 on my old VMs (where ICP v2.1.0.2 used to run) and my first attempt failed due to increased resource requirements compared to the previous version. If your deployment times-out while waiting for cloudant and you an error similar to below:
TASK [addon : Waiting for cloudant to start] ******************************************
 *********************************************************************
FAILED — RETRYING: TASK: addon :
Waiting for cloudant to start (13 retries left).
FAILED — RETRYING: TASK: addon :
Waiting for cloudant to start
Double check your h/w resources and run the installer with verbose options to see more details:
docker run -e LICENSE=accept — net=host \
-t -v “$(pwd)”:/installer/cluster \
ibmcom/icp-inception:3.1.0 install -vvv | tee -a install_log.txt
I ended up increased memory from 8GB to 16GB and disk capacity to 200GB (from 150GB) and all worked well after that.
After a successful install you should see a message similar to the below:
 PLAY RECAP *********************************************************************
 10.10.0.161 : ok=173 changed=94 unreachable=0 failed=0
 10.10.0.162 : ok=113 changed=55 unreachable=0 failed=0
 10.10.0.163 : ok=108 changed=51 unreachable=0 failed=0
 10.10.0.164 : ok=108 changed=50 unreachable=0 failed=0
 10.10.0.165 : ok=108 changed=49 unreachable=0 failed=0
 localhost : ok=265 changed=161 unreachable=0 failed=0POST DEPLOY MESSAGE ************************************************************The Dashboard URL: https://10.10.0.161:8443, default username/password is admin/admin
Playbook run took 0 days, 0 hours, 53 minutes, 54 seconds
One thing I have noticed is that installation completed much faster than the previous version. ICP got smarter and only pulling images that are required for the roles, also seems like taking advantage of the local image registries. My 5 node installation time dropped from 95 minutes to 53 minutes.
If your deployment is successful, you should be able to access your ICP login screen by visiting https://MASTERNODEIP:8443 (Default username/password is admin/admin).
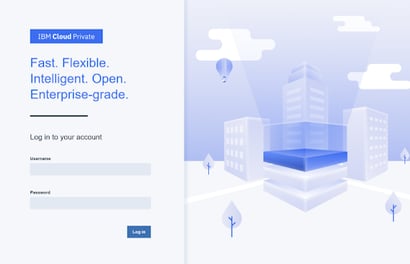
IBM Cloud Private Login Screen
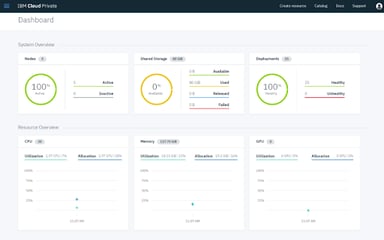
IBM Cloud Private Dashboard
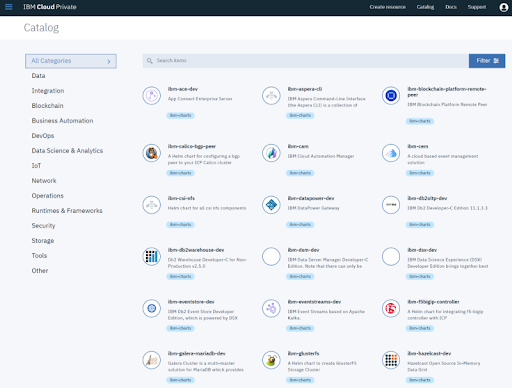
IBM Cloud Private Catalog
Uninstalling an older version of the IBM Cloud Private
IBM documentation is very clear with upgrade steps described here. It is unfortunate that upgrade is only supported from the 2.1.0.3 release since I had problems installing that version I kept my cluster at 2.1.0.2 and later clean install was the online way to go for me.
I have uninstalled the existing version with the comment below:
sudo docker run -e LICENSE=accept — net=host -t -v “$(pwd)”:/installer/cluster ibmcom/icp-inception:2.1.0.2 uninstallAlso removed all stopped containers:
docker system prune -afWhat’s next?
I will go over the configuration of other optional features in my next blog post as I get more familiar with the new platform.
- Introduction to IBM Cloud Private #2 — What’s new in 3.1 — quick comparison vs 2.1
- Introduction to IBM Cloud Private #3 — Catalog Applications
- Introduction to IBM Cloud Private #4 — How to deploy workloads on OpenEBS
- Introduction to IBM Cloud Private #5 — Monitoring IBM Cloud Private with Prometheus
- Introduction to IBM Cloud Private #6 — Use of metrics for monitoring utilization
- Introduction to IBM Cloud Private #7 — Contributing to the Community Charts
- Introduction to IBM Cloud Private #8 — Chaos Engineering with Litmus
- Introduction to IBM Cloud Private #9 — Backup your ICP cluster with OpenEBS & Heptio Ark
Above are some of the content I believe that it would be useful. If you like to see anything not covered here feel free to comment on my blog or contact me via Twitter @muratkarslioglu.
To be continued…
Originally published at Containerized Me.


Game changer in Container and Storage Paradigm- MayaData gets acquired by DataCore Software
Don Williams
Don Williams
Managing Ephemeral Storage on Kubernetes with OpenEBS
Kiran Mova
Kiran Mova
Understanding Persistent Volumes and PVCs in Kubernetes & OpenEBS
Murat Karslioglu
Murat Karslioglu