

Intro: OpenEBS Installation
OEP, the free-forever OpenEBS Platform (yes, a rename may be in the works…), simplifies the deployment of OpenEBS.
You may say - well, it’s just containers, and you can use Helm, right? And of course, you can, or you can grab the YAML as explained in the OpenEBS docs.
https://docs.openebs.io/v130/docs/next/installation.html
And as the docs explain, pretty quickly, you’ll be up and running with storage classes available to your users - including yourself - whether using dynamic LocalPV, or cStor or other data engines available within OpenEBS. As an aside, in a future post, we’ll talk about matching your workload needs to data engines. OpenEBS is fairly unique in this regard - it does not lock you into a particular engine and ships with a few different batteries included and more on the way.
The OpenEBS docs indirectly make a case for why you might want to use OEP.
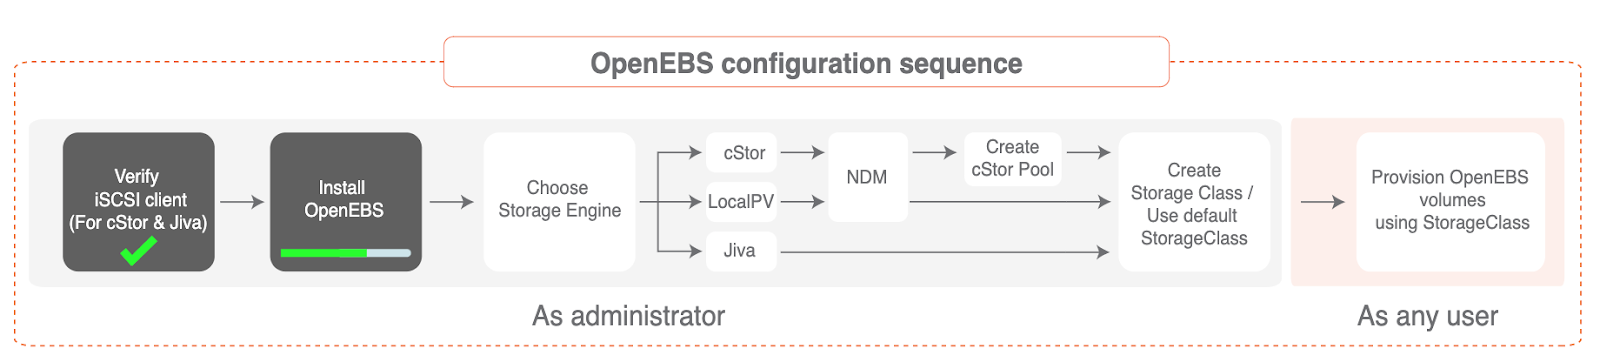
As you can see, the box “Install OpenEBS” is one step. You also will want to actually configure any underlying hardware or cloud volumes used by OpenEBS. And pretty quickly, you’ll want to see how users are consuming and these capabilities via Storage Classes. All of that functionality is easiest via OEP, as is adding back-ups. And checking on operational compliance. And visualizing it all. And logging… But I degrees. This blog is about Day 1 - initial deployment.
So let’s get started - OpenEBS Installation
First - do you want to do a simple OpenEBS installation with all the defaults pre-populated, including the creation and use of an OpenEBS namespace? If so - choose Basic. If you want to get under the hood a little more and choose a custom namespace and so forth, choose advanced. Let’s assume you are a relative newbie and just want the basics - so you click Basic.
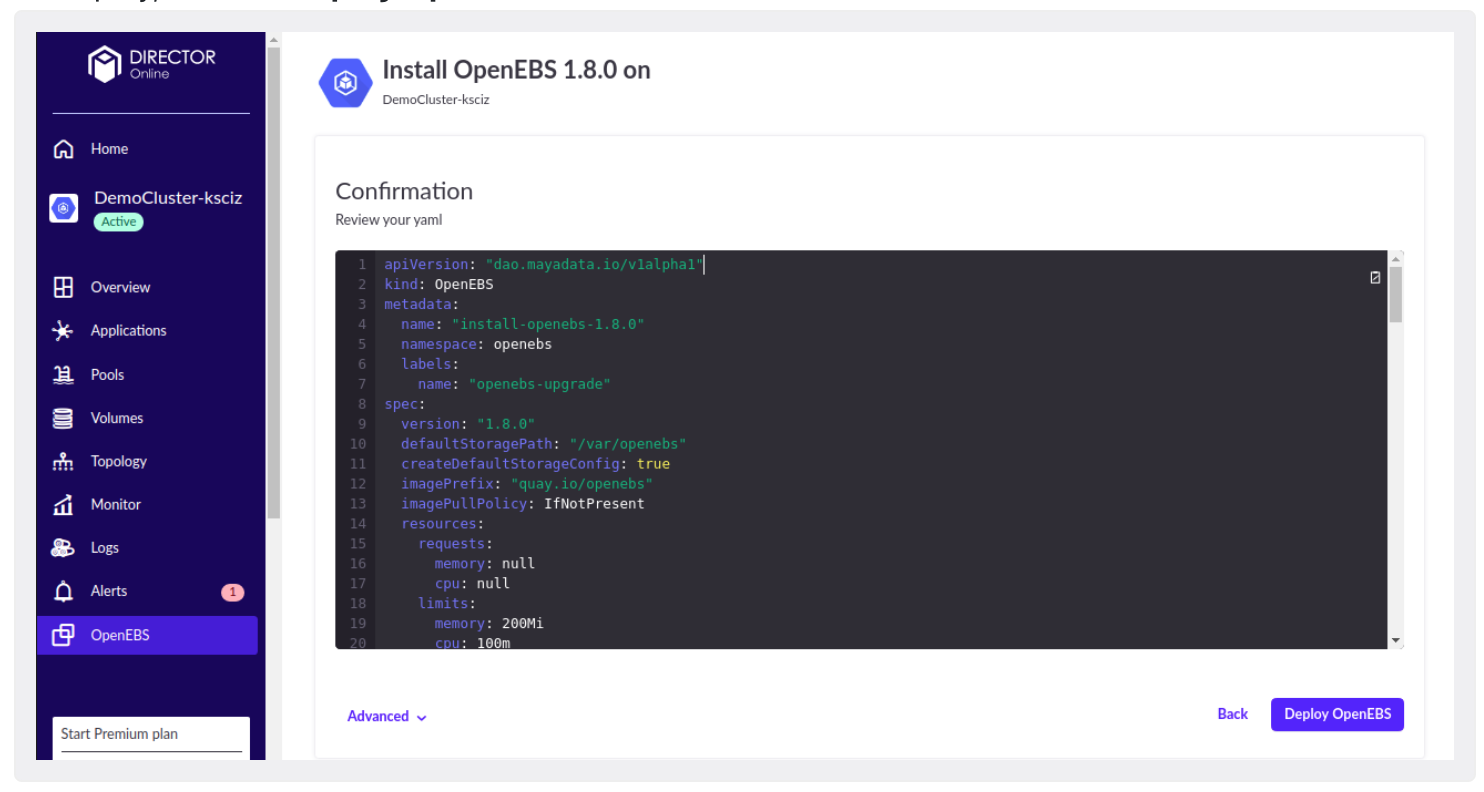
Once you review the YAML - which again has standard content for Basic deployments - you click “Deploy OpenEBS.” That’s it.
You’ll see a Happy screen as it completes along these lines:
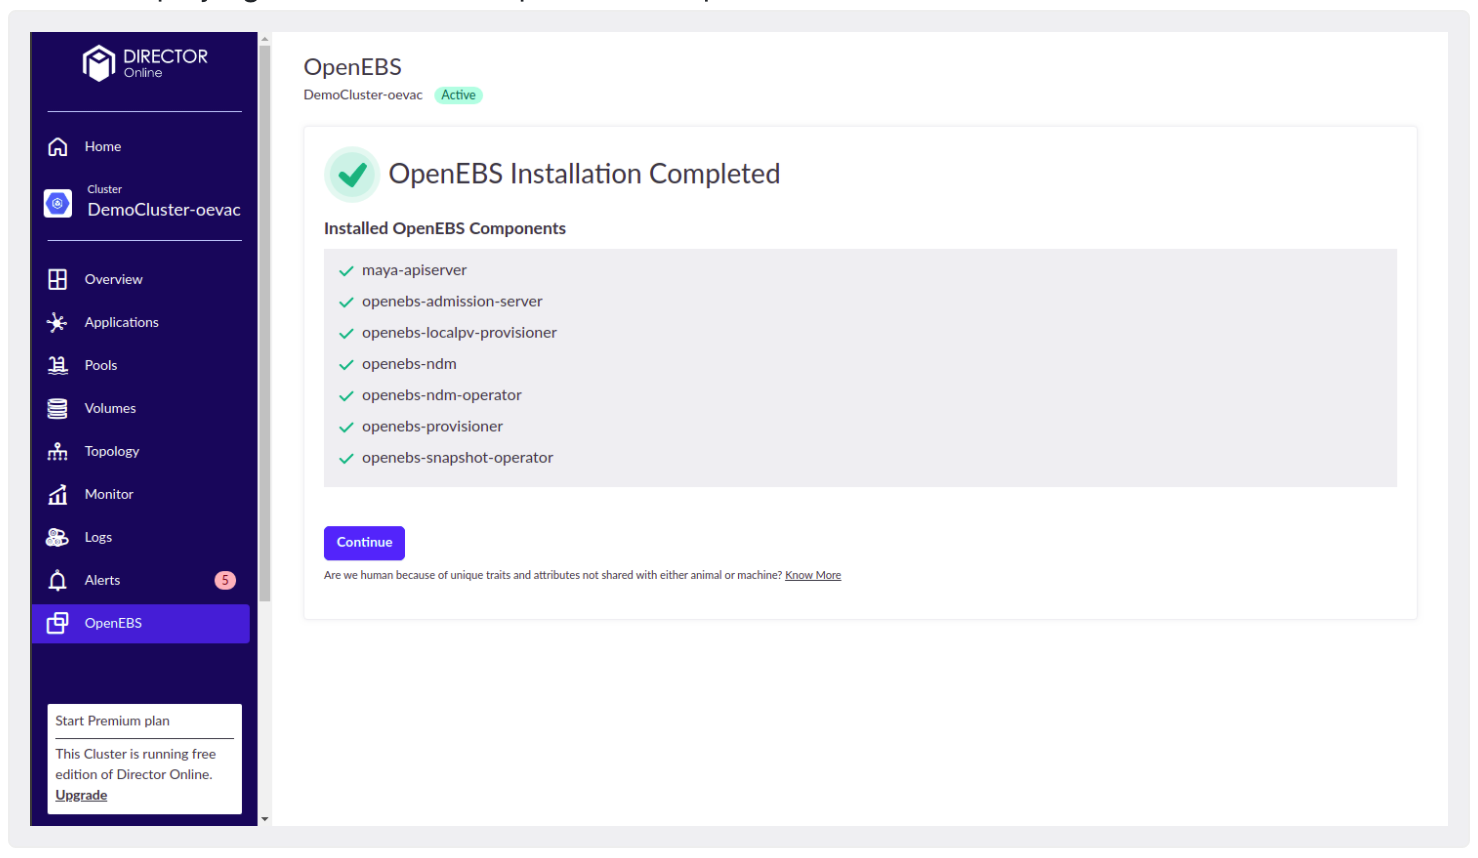
You are then good to continue. Try out the other capabilities to your heart’s content. You’re on your way towards trusting Kubernetes as your data layer.
Sometimes, though, things happen. What happens when despite the best effort of you and your Kubernetes cluster, a non-Happy path is followed? Grrr - clean up, right?
Well, there is an easy button for that case as well. Take a look:
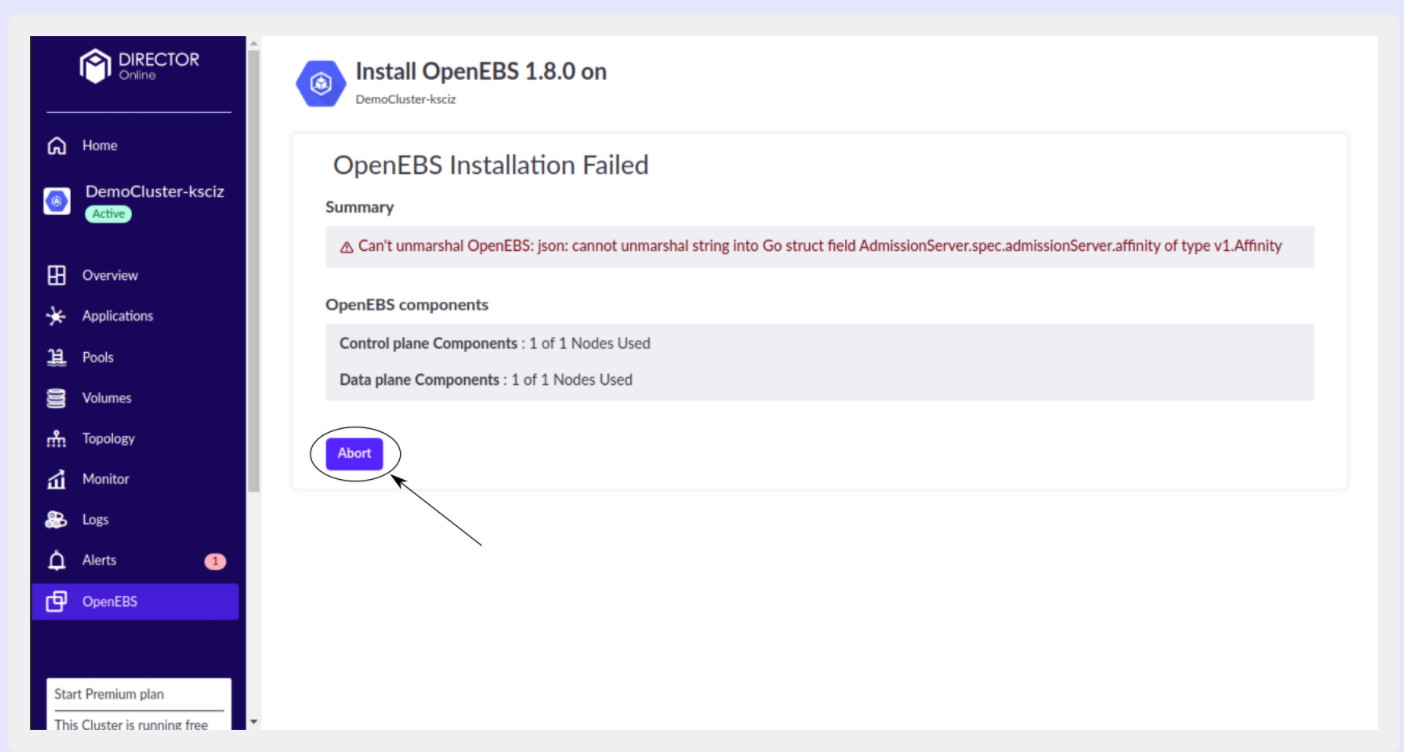
Click abort, and the deployment is cleaned up. You are then free to try again… Or get in touch with us, and we’ll see if we can help. As of Q2 2020, we see very few failures at this stage, but it does happen, and we do want to get your feedback.
That’s too easy!
What if the Basic deployment is too basic, and you want to use OEP to deploy AND configure OpenEBS, so it better takes advantage of whatever underlying systems and volumes you have available, then click Advanced.
Under Start Installation, specify the Namespace, Default Directory, and Docker registry for OpenEBS Installation.

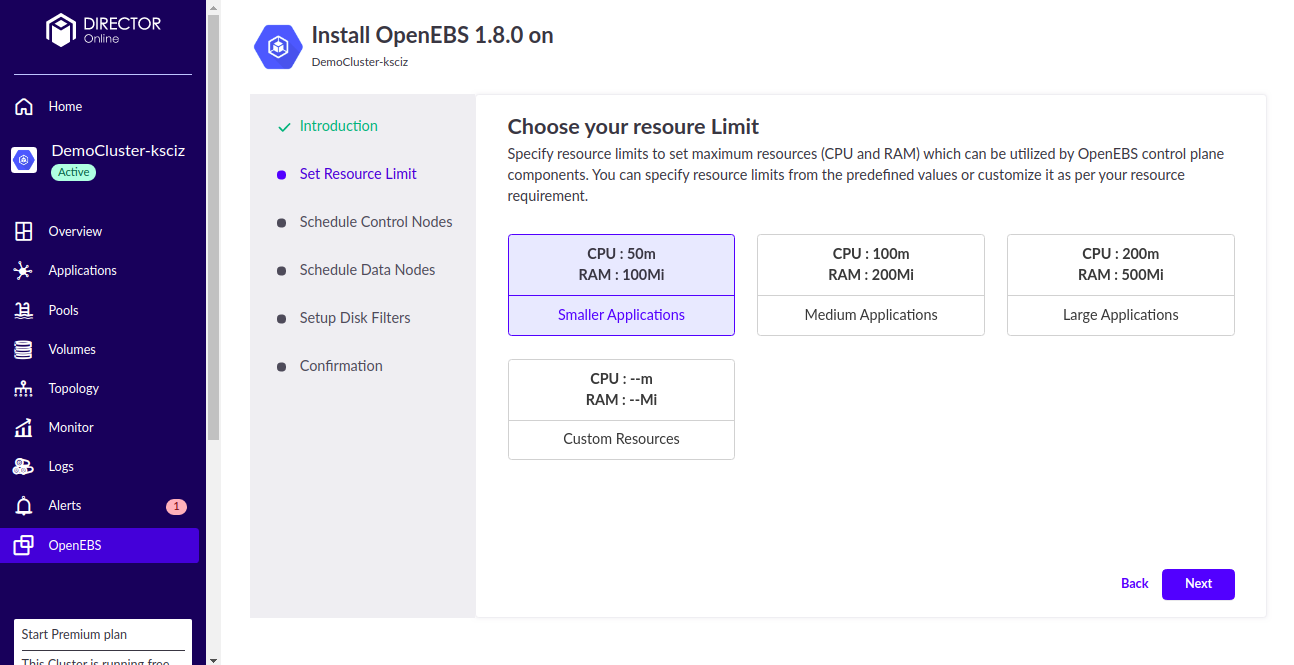
Next, Specify your resource limit. You can choose one of these options available based on the size of the application, or you can provide some custom values.
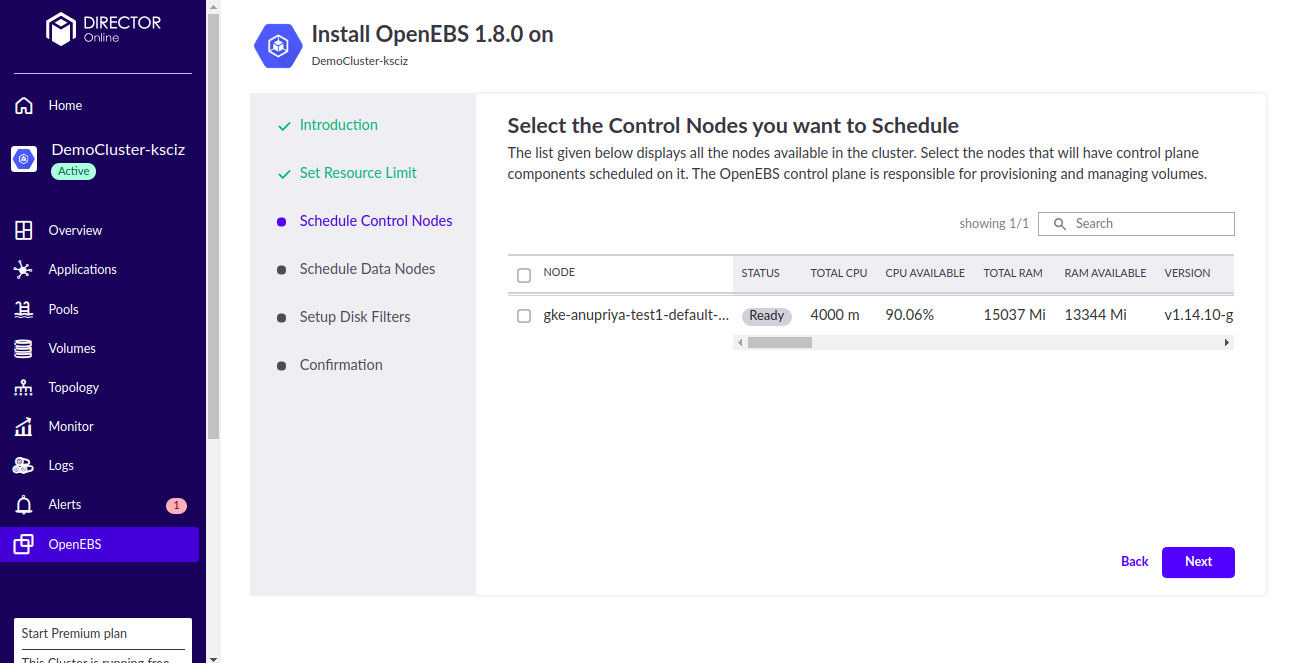
Then, select the nodes where Control Plane components will get scheduled. To be clear, this is NOT the data; this is the intelligence of OpenEBS itself.
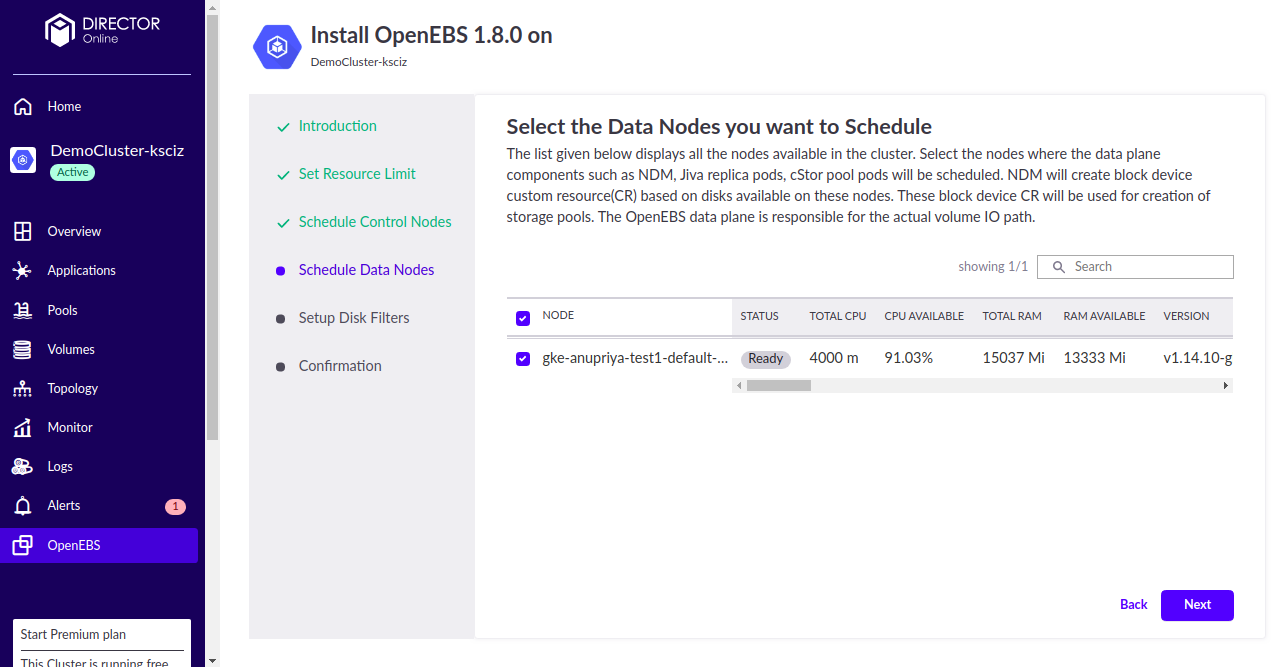
Keep going! Now you get to select the nodes where the Data Plane components should be scheduled. As the name suggests - these are the pieces of OpenEBS that are in the data path.
Lastly - you can segregate the Disk Filters under Include or Exclude. This interface leverages NDM, which is a MayaData originated sub-project that extends Kubernetes to track the inventory of places to store data. By the way, you’ll notice you can use different disks and volumes of various types - sure you can. It turns out that older storage systems and services often don’t allow “heterogeneous” disk, and cloud volume types, and this level of freedom provides you with a lot more flexibility as you and your data grow.
If you want to avoid lock-in, you’ve got to pay attention to the details.
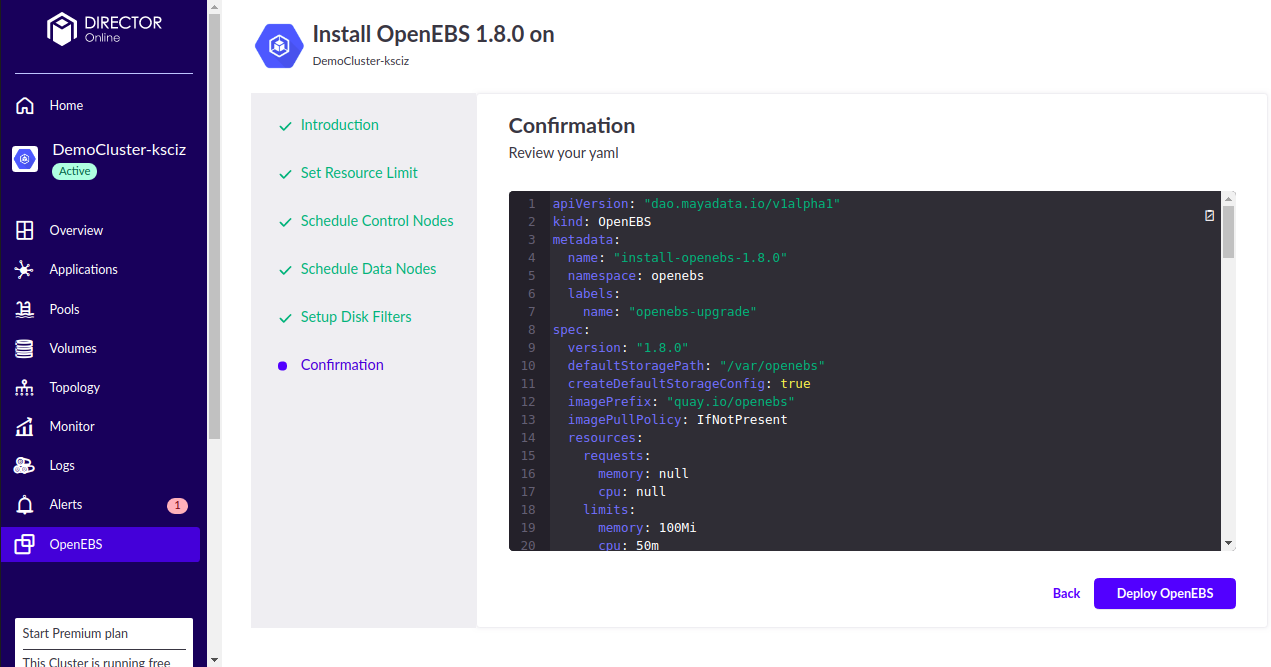
Once everything is done, the customized YAML gets displayed. Click on Deploy OpenEBS for OpenEBS installation.
And that’s it. You’re back in the same flow as before. If the non-Happy Path takes you away, you can, again, Abort at failure.
Congratulations!
That’s it! You are done. Please take a look around on this blog and on OEP itself and try out other functions. Keep in mind that OEP is increasingly organized around the workload itself. As you deploy workloads invoking the storage classes you’ve created and are creating, you’ll see they appear in OEP and that from OEP you can do a lot to make them more resilient and efficient in their operations. Feedback welcome and needed.


Game changer in Container and Storage Paradigm- MayaData gets acquired by DataCore Software
Don Williams
Don Williams
Managing Ephemeral Storage on Kubernetes with OpenEBS
Kiran Mova
Kiran Mova
Understanding Persistent Volumes and PVCs in Kubernetes & OpenEBS
Murat Karslioglu
Murat Karslioglu